DIY Car Air Filter Replacement: Tips and Tricks for the Do-It-Yourselfer


Maintaining a healthy and efficient engine is crucial for the performance and longevity of your car. One simplest yet often overlooked maintenance task is replacing the dirty air filter.
A clean air filter allows for proper airflow, improves fuel efficiency, and protects your engine from harmful contaminants.
While many car owners rely on mechanics for this job, replacing a car air filter is a straightforward do-it-yourself (DIY) task that can save you money and keep your engine running smoothly.
In this article, we will provide you with tips and tricks for DIY car air filter replacement, empowering you to take control of your vehicle's maintenance.
Step 1: Know Your Car's Air Filter
The first step in DIY car air filter replacement is understanding the type of air filter your vehicle requires. Cars can have different types of air filters, including panel filters, cylindrical filters, and cone filters.
Refer to your car's owner's manual to identify the correct filter type and size for your specific make and model. You can also consult with an auto parts store or search online using your car's details.
Step 2: Choose a Quality Air Filter
Investing in a high-quality air filter is essential for optimal engine performance. Look for filters from reputable brands that offer good filtration efficiency and durability. Consider factors like filtration rating, design, and materials used.
High-efficiency filters can effectively trap dust, pollen, dirt, and other contaminants, providing cleaner air for your engine. Remember that a quality air filter is a small investment that can significantly impact your vehicle's performance.
Step 3: Determine the Replacement Interval
Car air filters should be replaced at regular intervals to ensure proper engine function. The replacement frequency depends on factors such as driving conditions, air quality, and the manufacturer's recommendations.
As a general guideline, replacing the air filter every 12,000 to 15,000 miles (or 12 to 15 months) is advisable. However, it's essential to inspect the filter regularly and replace it sooner if it appears dirty, clogged, or damaged.
Step 4: Gather the Necessary Tools
Before you start the replacement process, gather the tools you'll need. Depending on your car's design, you'll typically require basic tools such as a screwdriver, pliers, and possibly a socket set.
It's a good idea to have a clean cloth or shop towels on hand to wipe away any debris or dirt that may be present around the filter housing.
Step 5: Locate the Air Filter Housing
The next step is to locate the air filter housing in your car. In most vehicles, the air filter housing is located under the hood, near the engine. Refer to your car's owner's manual or search online for the specific location of the air filter housing in your make and model. Once you've located it, ensure that the engine is cool before proceeding.
Step 6: Remove the Old Air Filter
Carefully open the air filter housing by loosening the screws or clips that secure it. Take note of how the old air filter is positioned inside the housing before removing it.
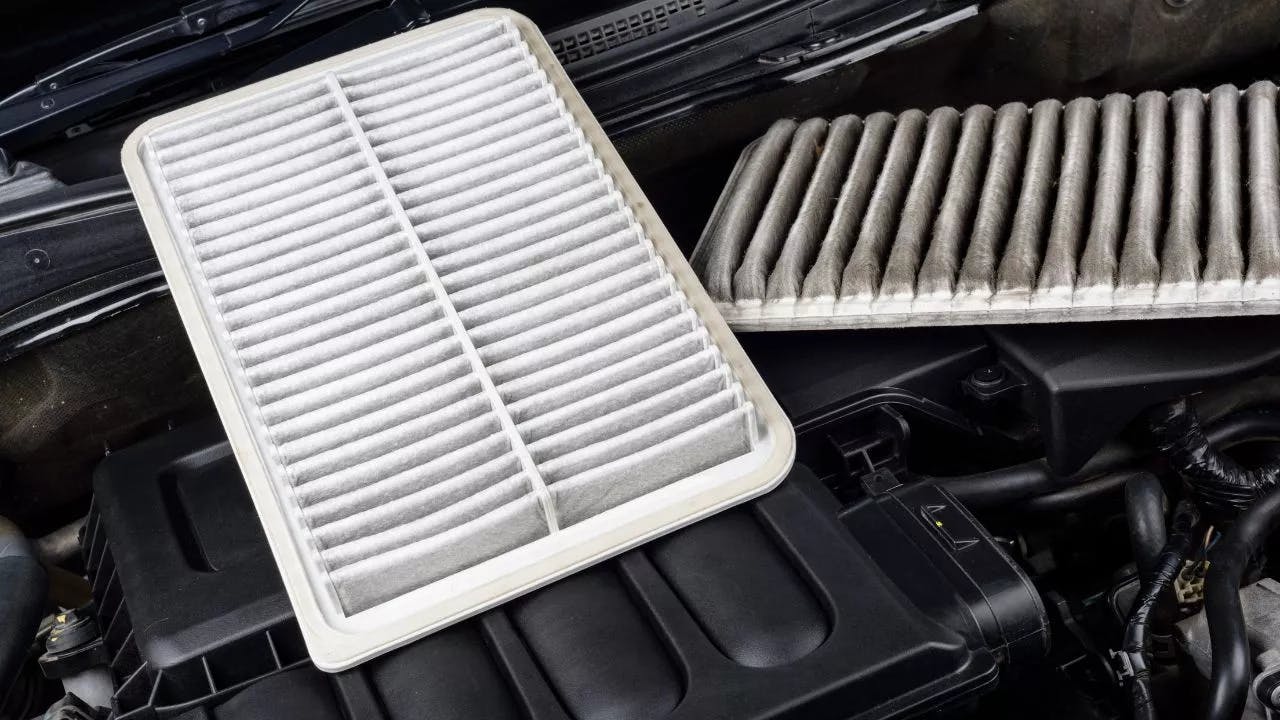
Inspect the filter for dirt, debris, or signs of damage. If it's dirty or clogged, it's time for a replacement. Use a clean cloth or compressed air to remove any loose debris from the housing before inserting the new filter.
Step 7: Install the New Air Filter
Remove the new air filter from its packaging and position it correctly in the housing. Ensure that it fits snugly and securely, following the same orientation as the old filter. Double-check that the filter is seated correctly and that the housing is closed securely. Do not force the filter into place; it should slide in easily.
Step 8: Double-check the Installation
Once you've installed the new air filter, take a moment to double-check that everything is in place correctly. Ensure that the filter is properly aligned with the housing and that there are no gaps or loose connections.
This step is crucial to prevent any unfiltered air from bypassing the filter and entering the engine. Secure the housing by tightening the screws or clips, ensuring a snug fit.
Step 9: Dispose of the Old Filter
Properly dispose of the old air filter to prevent any further contamination. Place it in a plastic bag or wrap it in newspaper to contain the collected dust and debris.
Check with your local waste management guidelines to determine the appropriate method of disposal. Some auto parts stores or service centers may offer filter recycling options.
Step 10: Maintain a Regular Replacement Schedule
Replacing the air filter is not a one-time task; it requires regular maintenance. Keep track of the replacement date by noting it down in a maintenance log or using a reminder system. Refer to your car's manual or consult with a trusted mechanic to determine the recommended replacement interval for your specific vehicle.
However, be aware that if you frequently drive in dusty or polluted areas, you may need to replace the air filter more frequently.
Step 11: Additional Maintenance Considerations
While you're working on your car's air filter, it's a good opportunity to perform other routine maintenance tasks. Check the surrounding components and hoses for any signs of wear or damage.
Clean the filter housing and the area around it to ensure no debris could affect the performance of the new filter. Consider inspecting and replacing other filters in your car, such as the cabin air filter, for optimal air quality.
Step 12: Seek Professional Help if Needed
If you're uncertain about the air filter replacement process or encounter any difficulties, don't hesitate to seek professional help.
A trusted mechanic or auto service center can guide you through the process or handle the replacement if you're uncomfortable doing it yourself. It's better to ensure the job is done correctly to protect your engine and maintain its performance.
Conclusion
By following these tips and tricks for DIY car air filter replacement, you can save money on regular maintenance and ensure the proper functioning of your vehicle's engine.
With just a few basic tools and a little bit of time, you can easily replace the air filter and enjoy the benefits of improved fuel efficiency, engine performance, and cleaner air.
Remember to prioritize safety and consult your car's manual or professionals when needed.
Regular air filter replacement is a small investment that can go a long way in keeping your car running smoothly for years to come.
Frequently Asked Questions
How often should I replace my car air filter?
The recommended replacement frequency depends on factors such as driving conditions, air quality, and the manufacturer's recommendations. As a general guideline, replacing the air filter every 12,000 to 15,000 miles (or 12 to 15 months) is advisable. However, it's essential to inspect the filter regularly and replace it sooner if it appears dirty, clogged, or damaged.
What type of air filter is best for my car?
Investing in a high-quality air filter is essential for optimal engine performance. Look for filters from reputable brands that offer good filtration efficiency and durability.
Consider factors like filtration rating, design, and materials used. High-efficiency filters can effectively trap dust, pollen, dirt, and other contaminants, providing cleaner air for your engine.
What tools do I need for DIY car air filter replacement?
Depending on your car's design, you'll typically require basic tools such as a screwdriver, pliers, and possibly a socket set.
It's a good idea to have a clean cloth or shop towels on hand to wipe away any debris or dirt that may be present around the filter housing. If you're uncertain about the air filter replacement process, don't hesitate to seek professional help from a trusted mechanic or auto service center.